CDN configuration
Configuration process
Our CDN configuration is very simple.
Fill in the resource name to distinguish different project sets.
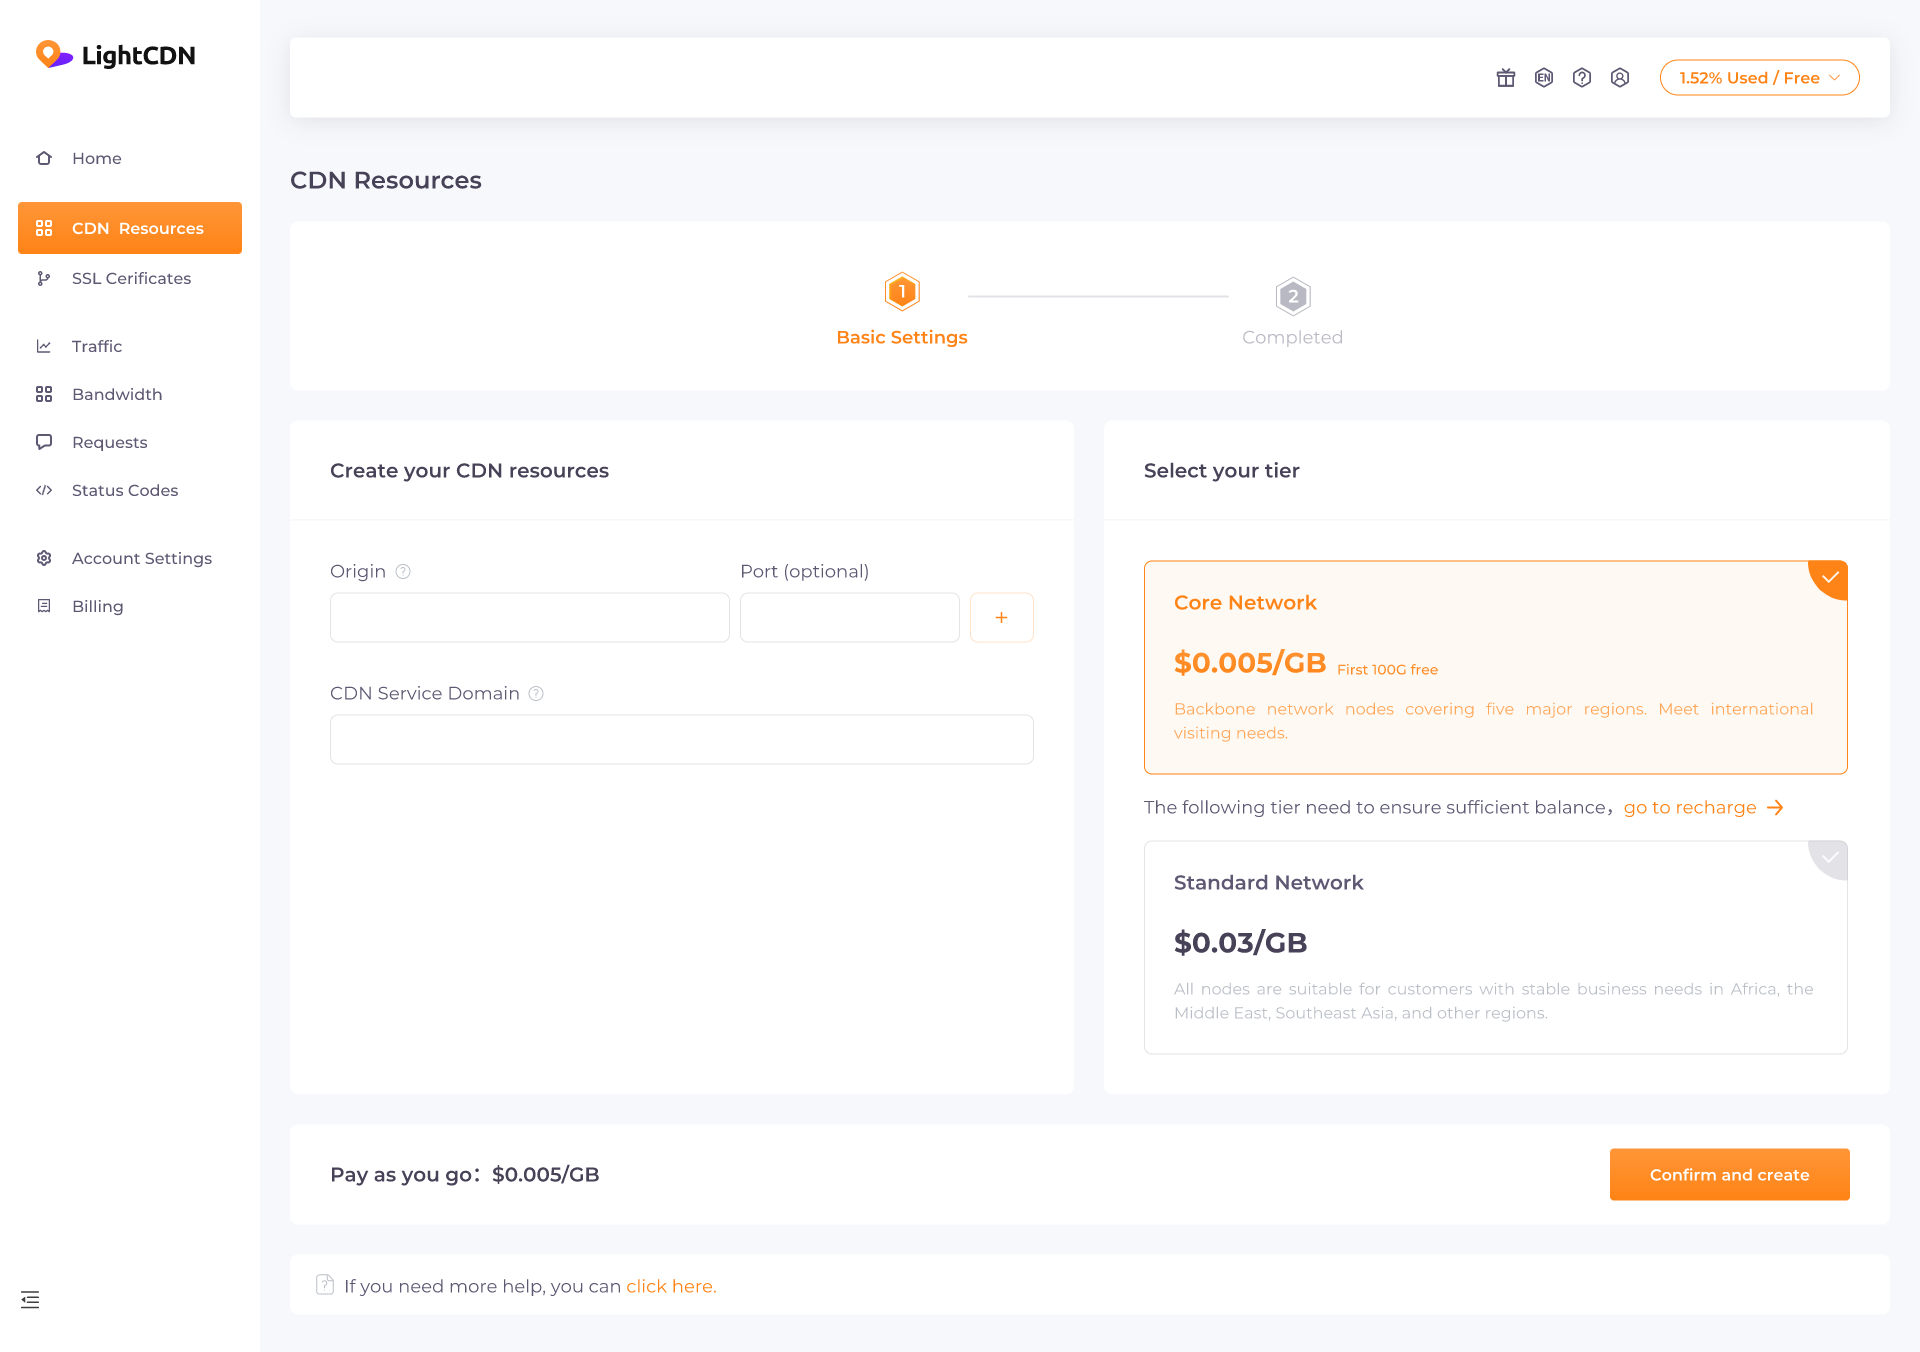
Fill in the domain name and origin address you need to accelerate.
Note here:
(1) Origin protocol: HTTP, HTTPS can be selected. This will determine which protocol the edge server uses to request the origin server.
(2) Origin: We support url or ip address. By default, our server will request files through the HTTP protocol and port (for http, we will request files through ports 80 and 8080, and for https, we will request files through port 443).
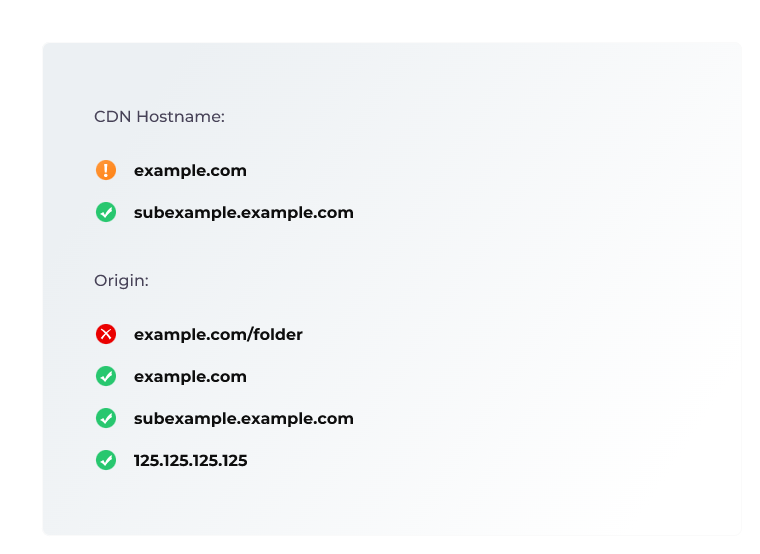
Note here that our source supports example.com or subexample.example.com, does not support example .com/folder.If you want CDN to cache the content only in example.com/folder, move the content from example.com/folder to the subdomain folder.example.com which should be used as an origin.
(3) CDN Hostname: CDN Hostname is the address accessed by users, usually the secondary domain name. The CDN hostname formats we support include example.com, subexample.example.com, or .example.com*. We do not recommend filling in the top-level domain name here, as most domain providers do not allow top-level domain name CNAME switching (i.e. DNS configuration of the domain name). You can fill in multiple CDN hostnames, with each CDN hostname on a line that needs to be filled in with a new line.
Choose the network tier you want to activate, which determines the range of acceleration you can accelerate in the future. It should be noted that if you purchase the monthly plan in advance, we will assume that you will accelerate according to the tier of the monthly plan. Please refer to billing for specific billing rules.
We will generate a CNAME. You can find it in the Activate Configuration.
In this step, you need to configure DNS on the website of your domain name service provider, and point your accelerated domain name to the CNAME address produced by us. Please refer to the CNAME DNS configuration menu.
In this way, you have completed the basic configuration of the CDN. Later, you can find the resource in the CDN list for operations such as cache time, CORS, and pre storage clearing.
Tier selection
When creating resources, you can choose different tiers. The tier will affect the range of use of your acceleration position, and the unit price will vary for different tiers.
There are currently two network tiers available for selection.
Standard network: It includes all nodes and is suitable for customers whose business is distributed globally. Among them, regions such as Africa, the Middle East, and Southeast Asia with stable business needs are more suitable.
Core network: an international node consisting of eight backbone networks, covering five continents, suitable for business without regional bias or exploring customers.
CNAME DNS configuration
CNAME is technically different URL alias. We will create an accelerated domain name for you, which is the sub domain name "xxx.cdn95. com" under the LightCDN domain name. In order to enable you to directly use your own website, please complete the configuration according to the following steps:
In the activation list, we show the CNAME we generated.
Log in to your own DNS (the service provider platform of the domain name) and configure a DNS record in the panel. Normally, the parameters will be filled as follows:
Host Record → accelerate prefix of domain name address
Type → CNAME
Records → CNAME address generated by us
Example,your own website:show.example.com
show CNAME 10219741.cdn95.com
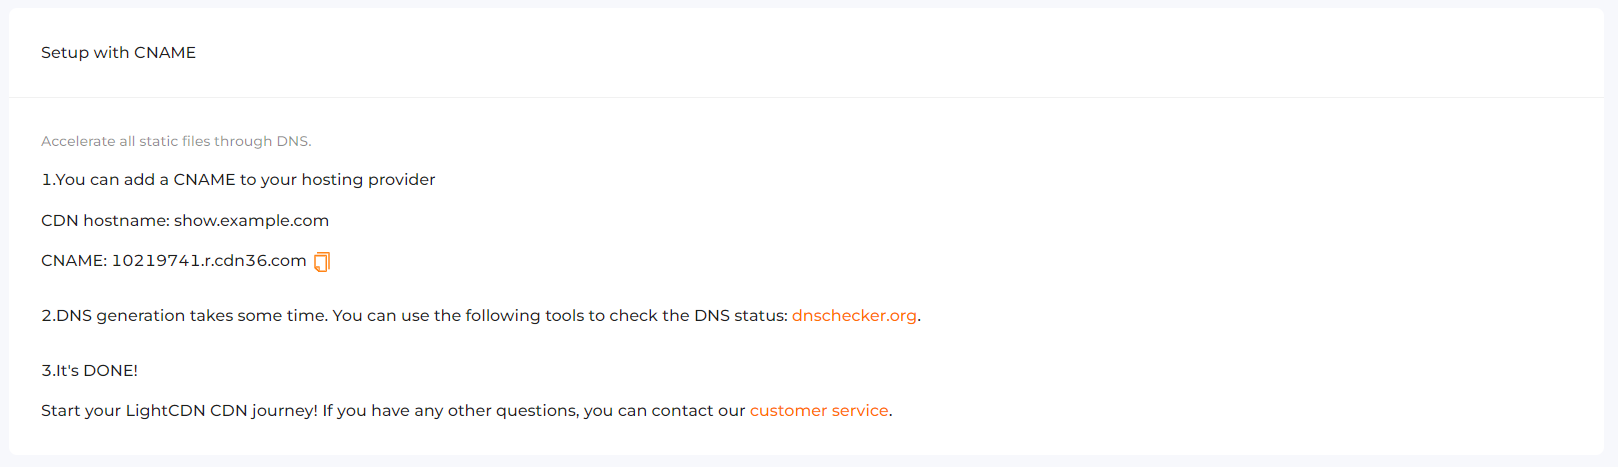
If you are not familiar with DNS, please contact the domain provider to assist you in DNS configuration. Note that DNS changes may take 24 hours to take effect.
How to check whether your CNAME is completed?
Simple, you can use the website Verify: https://dnschecked.com/